
□ notebook 위 코드를 worker에 이식하여 예측을 진행
- model.py
import numpy as np
from PIL import Image
from keras.models import load_model
import os

def get_model():
    # 모델 로드
    f = __file__
    dir_name = os.path.dirname(f)
    model_path = os.path.join(dir_name,"mnist240924.keras")
    model = load_model(model_path)

    return model

# 사용자 이미지 불러오기 및 전처리
def preprocess_image(file_path):
    img = Image.open(file_path).convert('L')  # 흑백 이미지로 변환
    img = img.resize((28, 28))  # 크기 조정

    # 흑백 반전
    # img = 255 - np.array(img)  # 흑백 반전
    img = np.array(img)

    img = img.reshape(1, 28, 28, 1)  # 모델 입력 형태에 맞게 변형
    img = img / 255.0  # 정규화

    return img

# 예측
def predict_digit(file_path):
    model = get_model()
    img = preprocess_image(file_path)
    prediction = model.predict(img)
    digit = np.argmax(prediction)

    return digit
-worker.py
import jigeum.seoul
from mnist.db import select, dml
from mnist.model import get_model, preprocess_image, predict_digit
import os
import requests

def get_job_img_task():
    sql = """
    SELECT
        num, file_name, file_path
    FROM image_processing
    WHERE prediction_result is NULL
    ORDER BY num -- 가장 오래된 요청
    LIMIT 1 -- 하나씩
    """

    r = select(sql, 1)
    if len(r) > 0:
        return r[0]
    else:
        return None

    return r[0]


def prediction(file_path,num):
    sql = """UPDATE image_processing
    SET prediction_result=%s,
        prediction_model='n23',
        prediction_time=%s
    WHERE num=%s
    """

    presult = predict_digit(file_path)
    print(f"*********************** {presult}   { jigeum.seoul.now()}      {num}")
    dml(sql, presult, jigeum.seoul.now(), num)
    return presult

def run():
  """image_processing 테이블을 읽어서 가장 오래된 요청 하나씩을 처리"""

  # STEP 1
  # image_processing 테이블의 prediction_result IS NULL 인 ROW 1 개 조회 - num 갖여오기

  job = get_job_img_task()
  if job is None:
      print(f"{jigeum.seoul.now()}, num")
      return

  num = job['num']
  file_name = job['file_name']
  file_path = job['file_path']

  # STEP 2
  # RANDOM 으로 0 ~ 9 중 하나 값을 prediction_result 컬럼에 업데이트
  # 동시에 prediction_model, prediction_time 도 업데이트
  presult = prediction(file_path,num)


  # STEP 3
  # LINE 으로 처리 결과 전송

  send_line_noti(file_name,presult)
  print(jigeum.seoul.now())

def send_line_noti(file_name='test', presult='-1'):
    api = "https://notify-api.line.me/api/notify"
    token = os.getenv('LINE_NOTI_TOKEN', 't5mTs8lD9zRUisWxZrbKHoHWKDUipPur73gYPs1c5IE')
    h = {'Authorization' : 'Bearer ' + token}
    msg = {
        "message" : f"{file_name} => {presult}"
    }
    r = requests.post(api, headers=h, data=msg)
    print(r)
    print(f"SEND LINE NOTI: + {presult}")
나는 Dockerfile에 모델을 COPY 해서 사용하는 방법을 생각했는데, 알고보니 pip install로 내 깃허브를 설치하기 때문에 그렇게 할 필요가 없었다. (model.py : get_model() 참고)
__file__ 에 대해서 알게 되었다.
그리고 이 부분이 잘 작동되기 위해서는 model.py가 있는 위치에 모델이 존재해야한다.
로컬에서 테스트 완료했다.
그리고 도커 빌드해서 도커허브에 push 하고 AWS 서버에서 pull 받아와서 테스트를 했는데...
내가 모르는 새에 테이블에 lable 컬럼이 이 생겼다.ㅎ
숫자를 예측하는 프로그램이니까 예측한 값 말고 실제 값이 있어야한다고 했다.
파일 이름의 첫 번째 글자를 가져오도록 했다.
[main.py 수정]
@app.post("/uploadfile/")
async def create_upload_file(file: UploadFile):
    # 파일 저장
    img = await file.read()
    file_name = file.filename
    file_ext = file.content_type.split('/')[-1]
    label = file_name[0]

    # 디렉토리가 없으면 오류, 코드에서 확인 및 만들기 추가
    upload_dir = os.getenv('UPLOAD_DIR','/home/sujin/code/mnist/img')
    if not os.path.exists(upload_dir):
        os.makedirs(upload_dir)
    import uuid
    file_full_path = os.path.join(upload_dir,
            f'{uuid.uuid4()}.{file_ext}')

    with open(file_full_path, "wb") as f:
        f.write(img)

    sql = "INSERT INTO image_processing(file_name, label file_path, request_time, request_user) VALUES(%s, %s, %s, %s, %s)"
    import jigeum.seoul
    from mnist.db import dml
    insert_row = dml(sql, file_name, label, file_full_path, jigeum.seoul.now(), 'n23')

    return {
            "filename": file.filename,
            "content_type": file.content_type,
            "file_full_path": file_full_path,
            "insert_row_cont": insert_row,
            "label" : label
           }

서버 DB에 이런식으로 들어가고 (원래는 NULL ~~로 들어감)
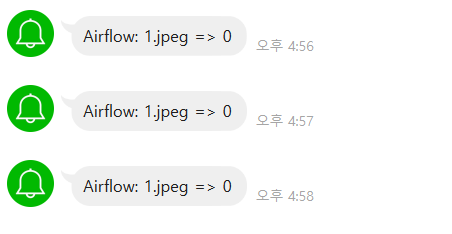
내가 돌린 건 알람도 잘 온당
'playdata > daily' 카테고리의 다른 글
| 12주차 : Day 5 (9/27) (1) | 2024.09.30 |
|---|---|
| 12주차 : Day 4 (9/26) (0) | 2024.09.30 |
| 12주차 : Day 2 (9/24) (0) | 2024.09.30 |
| 12주차 : Day 1 (9/23) (2) | 2024.09.24 |
| 10주차 : Day 4,5 (9/12,13) (3) | 2024.09.23 |